Looker Studio is a powerful and free tool from Google that allows you to build interactive dashboards and reports using data from multiple sources. If you’re new to it, one of the first things you’ll need to learn is how to add a data source to Looker Studio so you can begin visualizing your data effectively.
While Looker Studio makes it easy to connect to a variety of platforms like Google Analytics, BigQuery, and Google Sheets, the setup process can feel a bit unfamiliar at first. This quick guide walks you through each step so you can get started confidently.
Step-by-Step: Connecting a Data Source to Looker Studio
1. Open Your Report and Enter Edit Mode
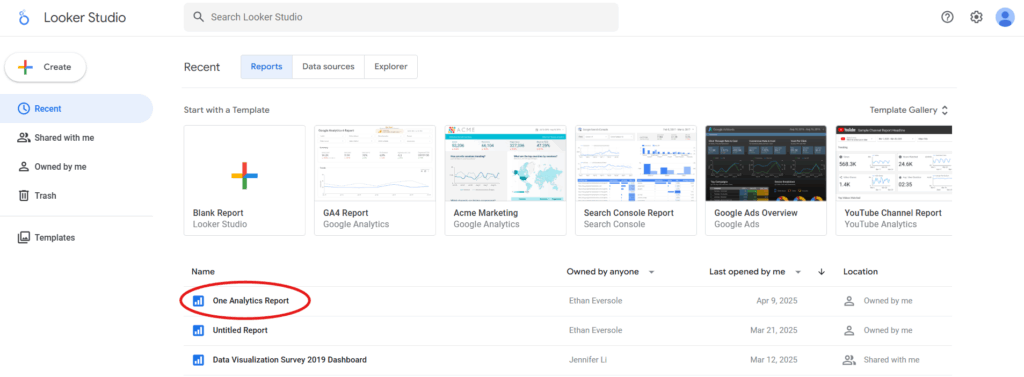
From the Looker Studio homepage, open the report you want to work with or create a new one.
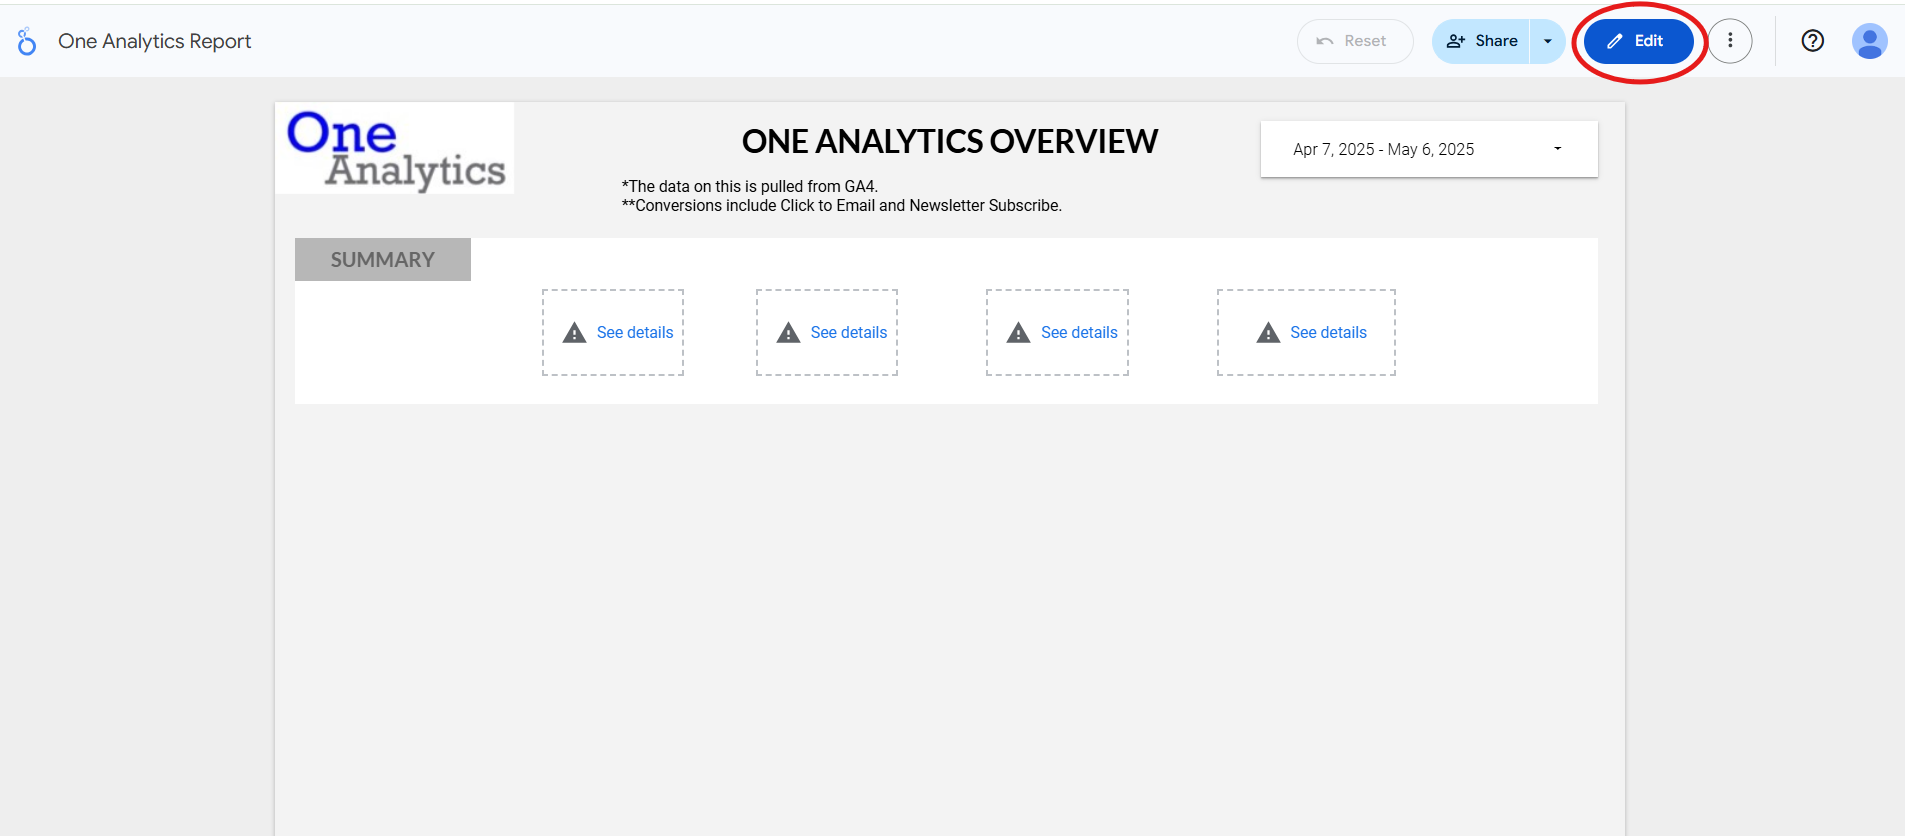
Once you’re in the report, click the blue “Edit” button in the top right corner. This puts you into Edit mode, where you can start customizing your dashboard.
2. Add and Connect a Data Source
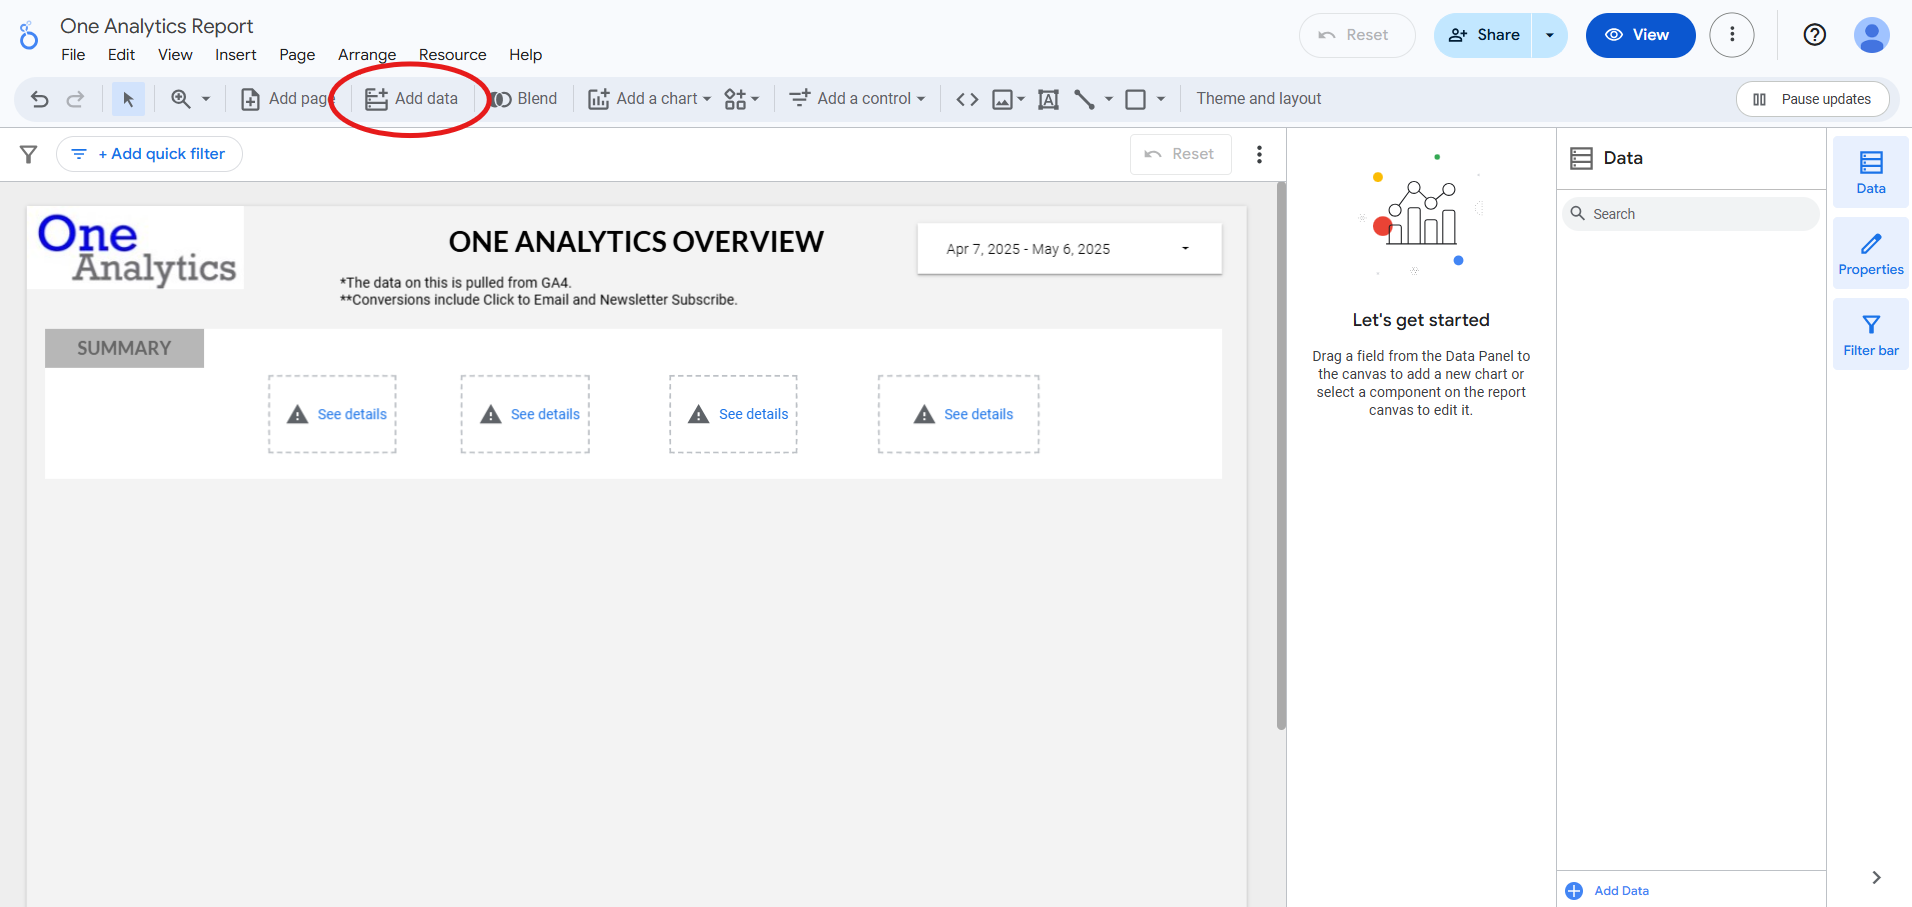
Next, click “Add data” from the top menu.
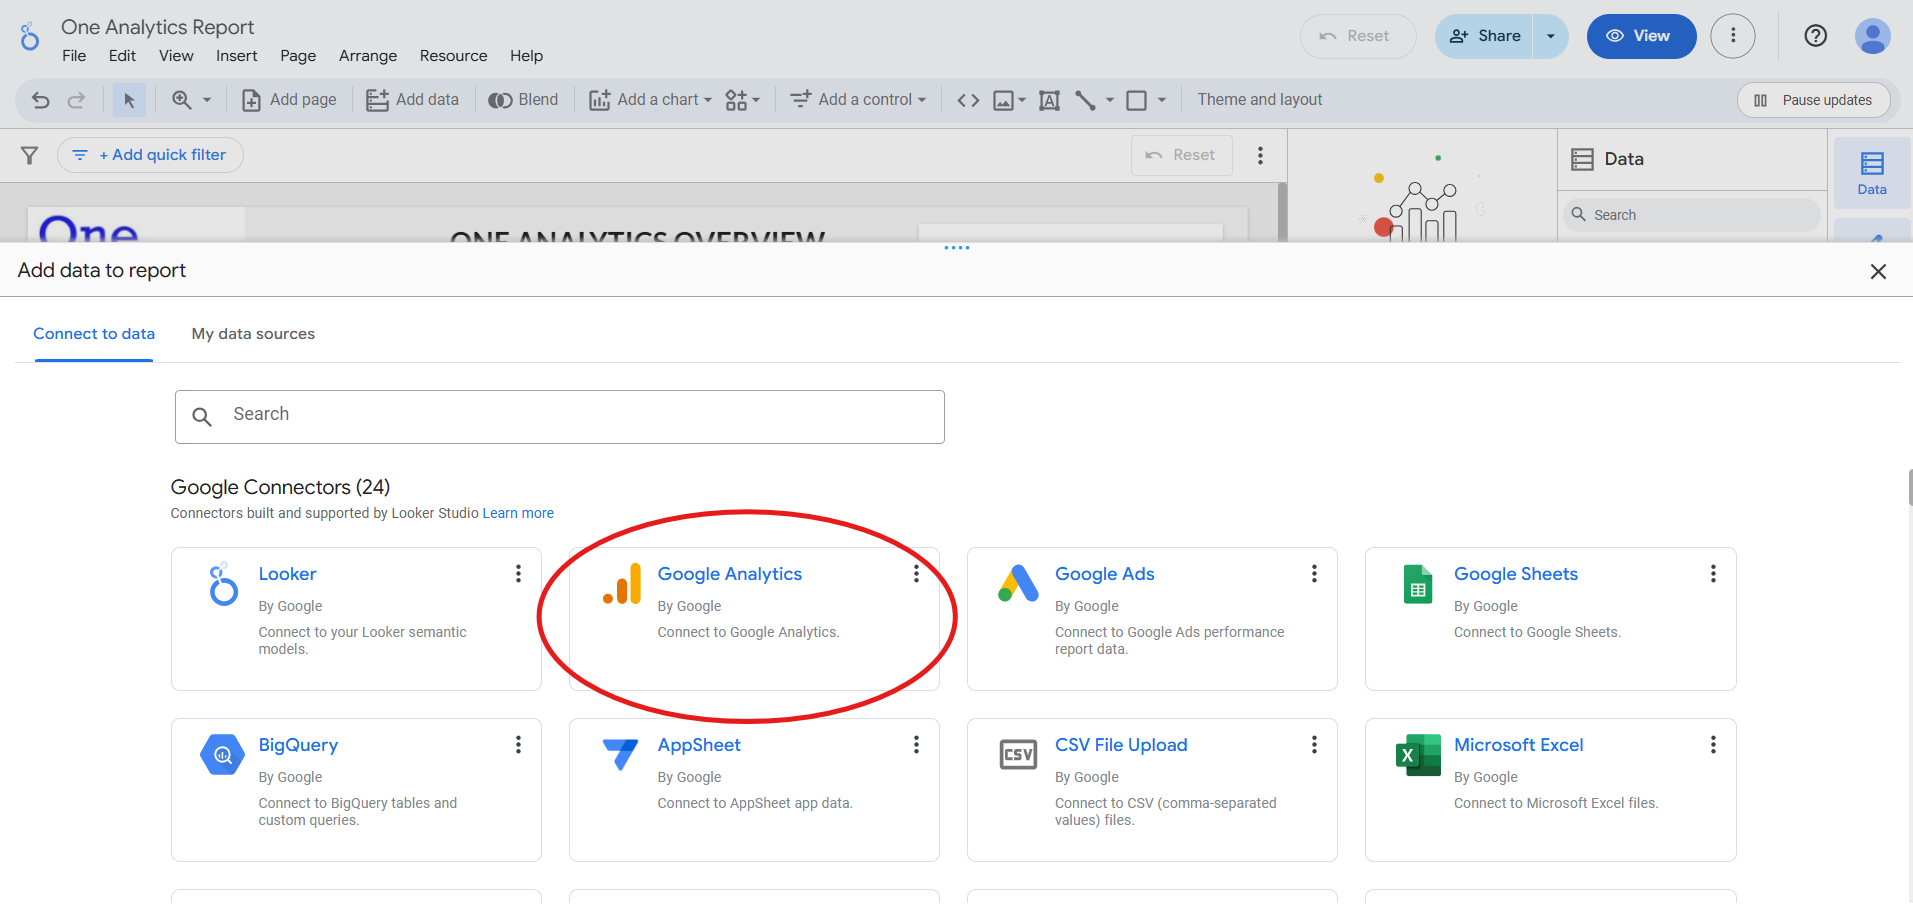
You’ll see a list of connectors. In this example, we’ll connect to Google Analytics.
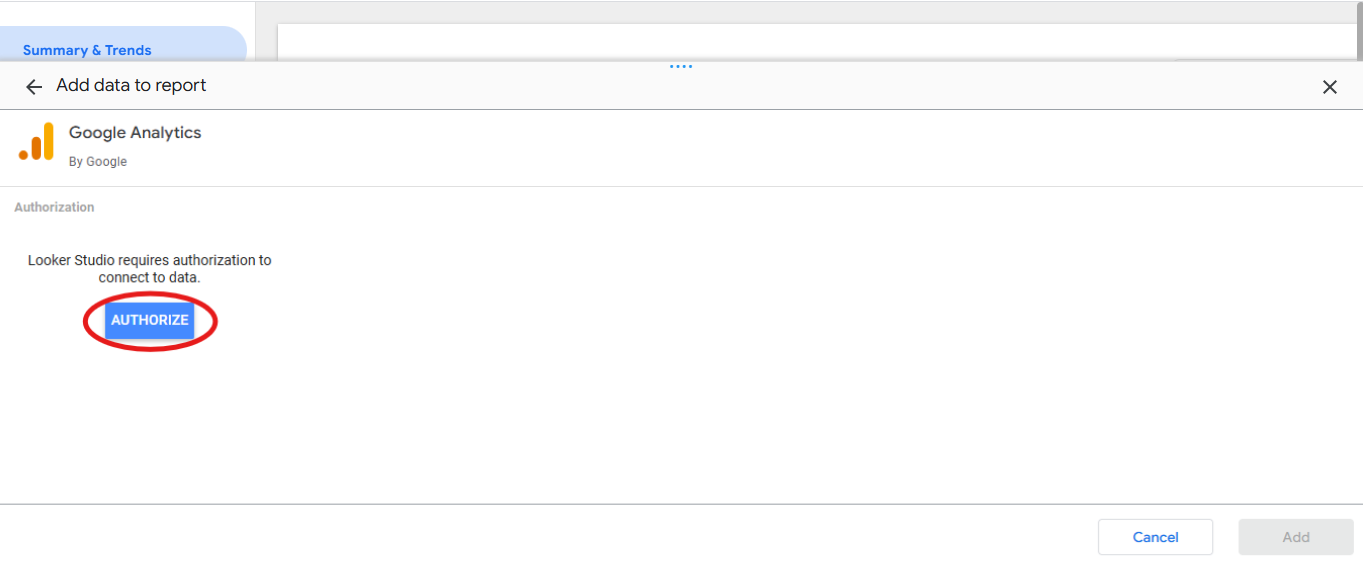
Click “AUTHORIZE” to allow Looker Studio to connect to your Google Analytics accounts. Proceed through the additional authentication steps.
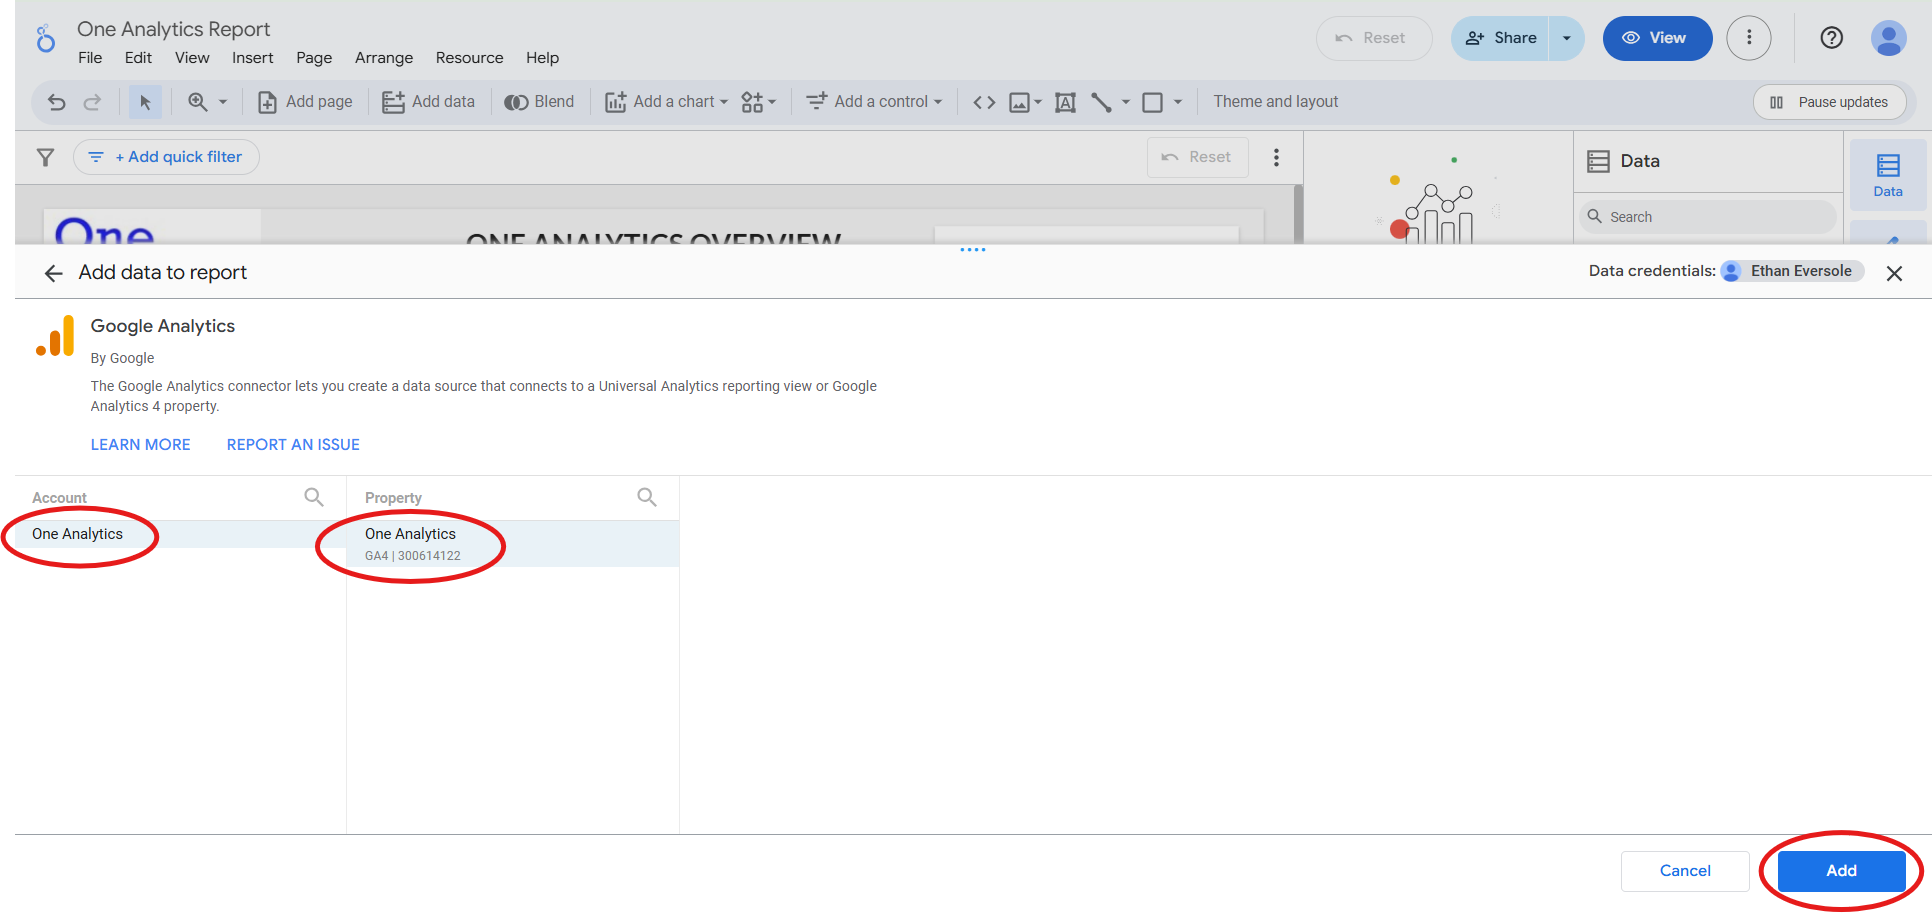
Select the Google Analytics account and property you want to pull data from. Then click the blue “Add” button.
A prompt will appear to confirm you want to add data to the report. Click “ADD TO REPORT”.
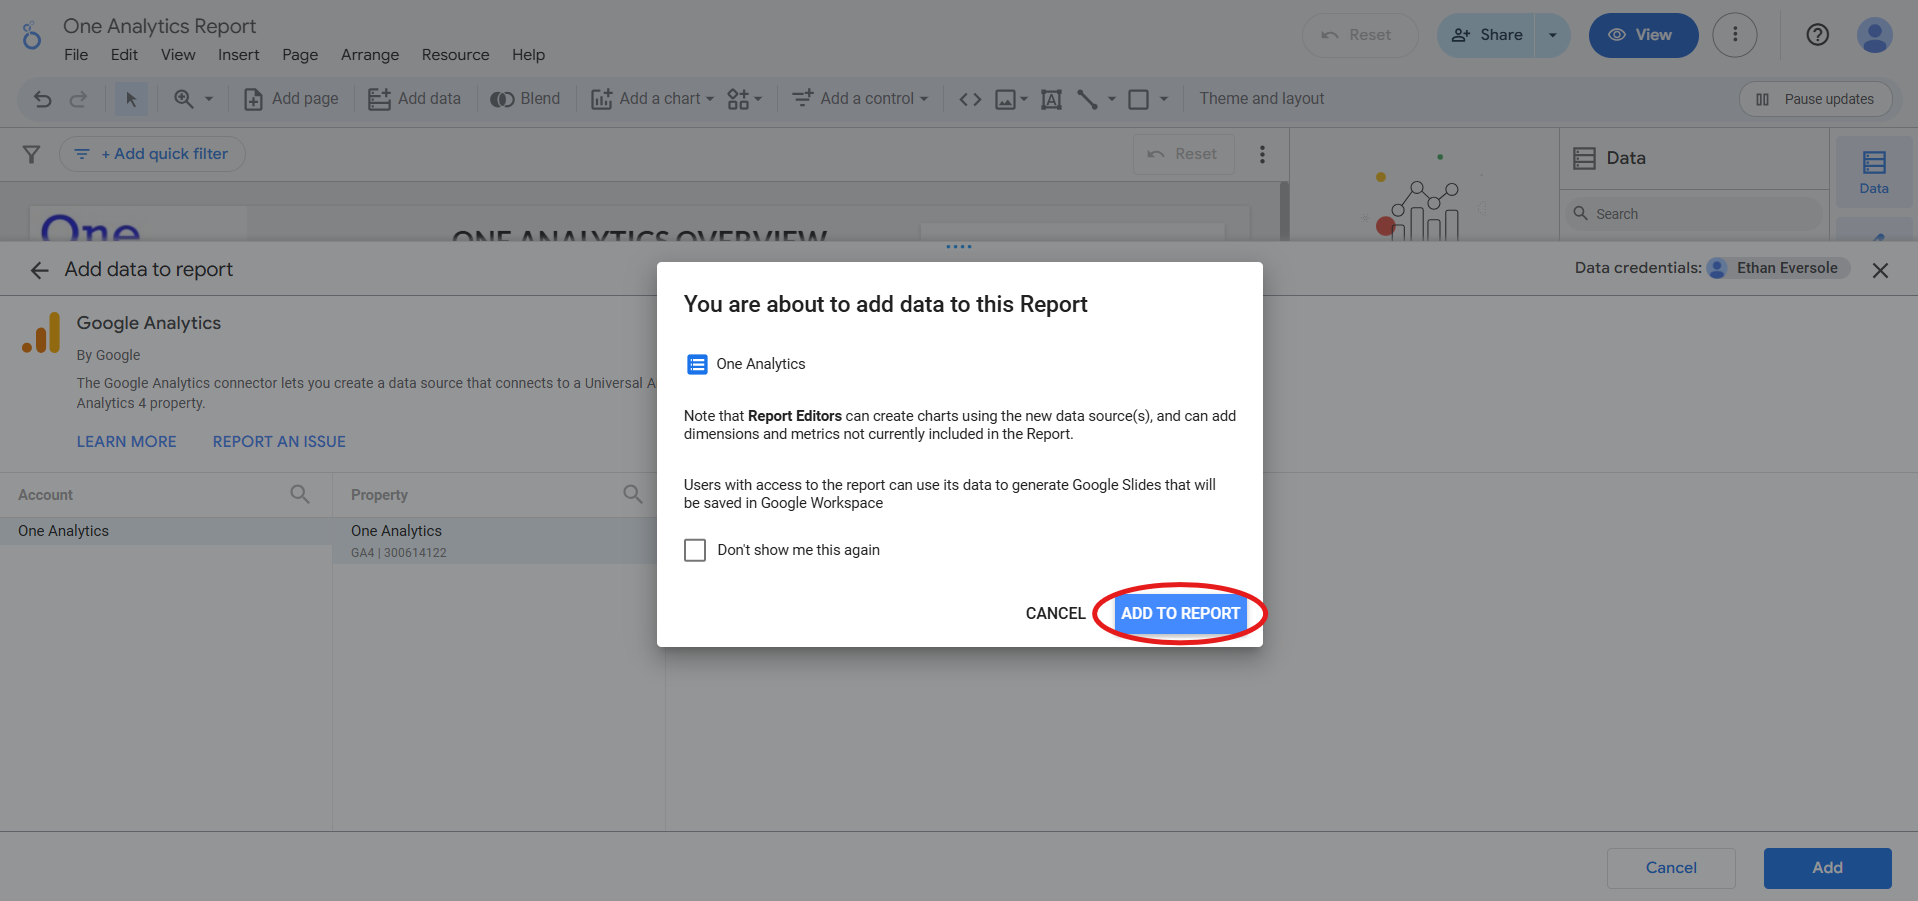
You’ve successfully linked your data source to the report!
3. Confirm the Connection and Start Building
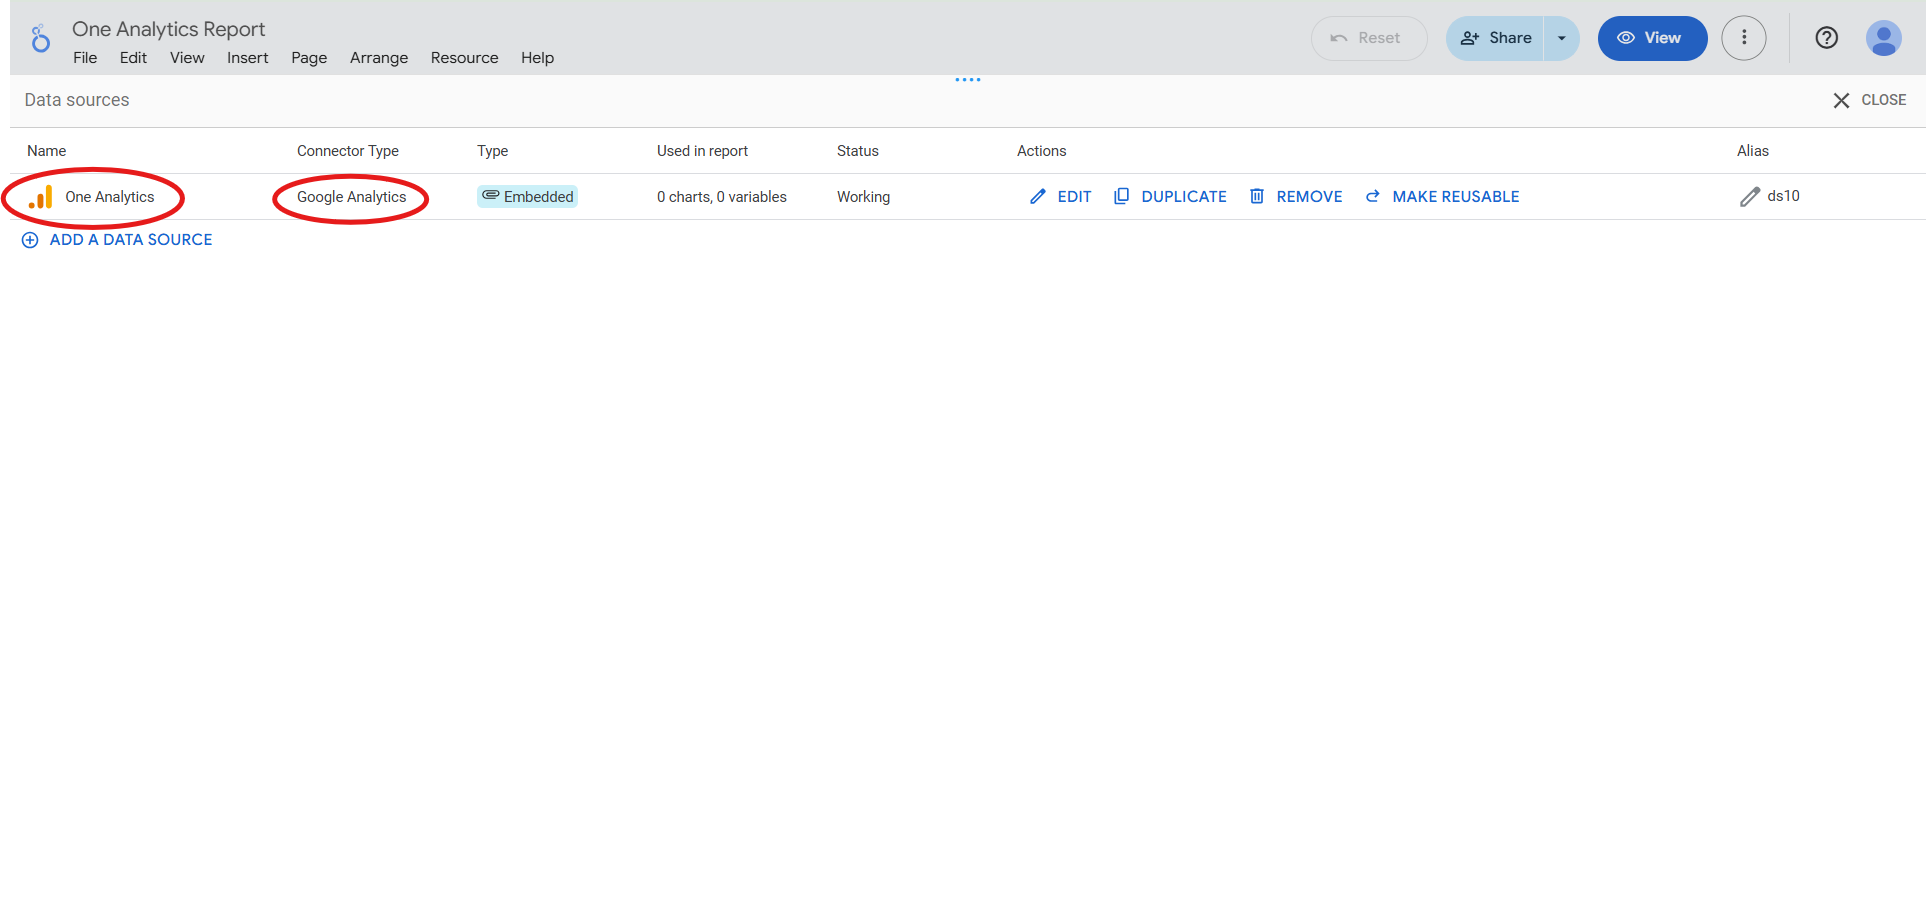
To double-check that everything is connected properly, go to the top menu and click “Resource” and then “Manage added data sources”. This shows you a list of all data sources linked to your report.
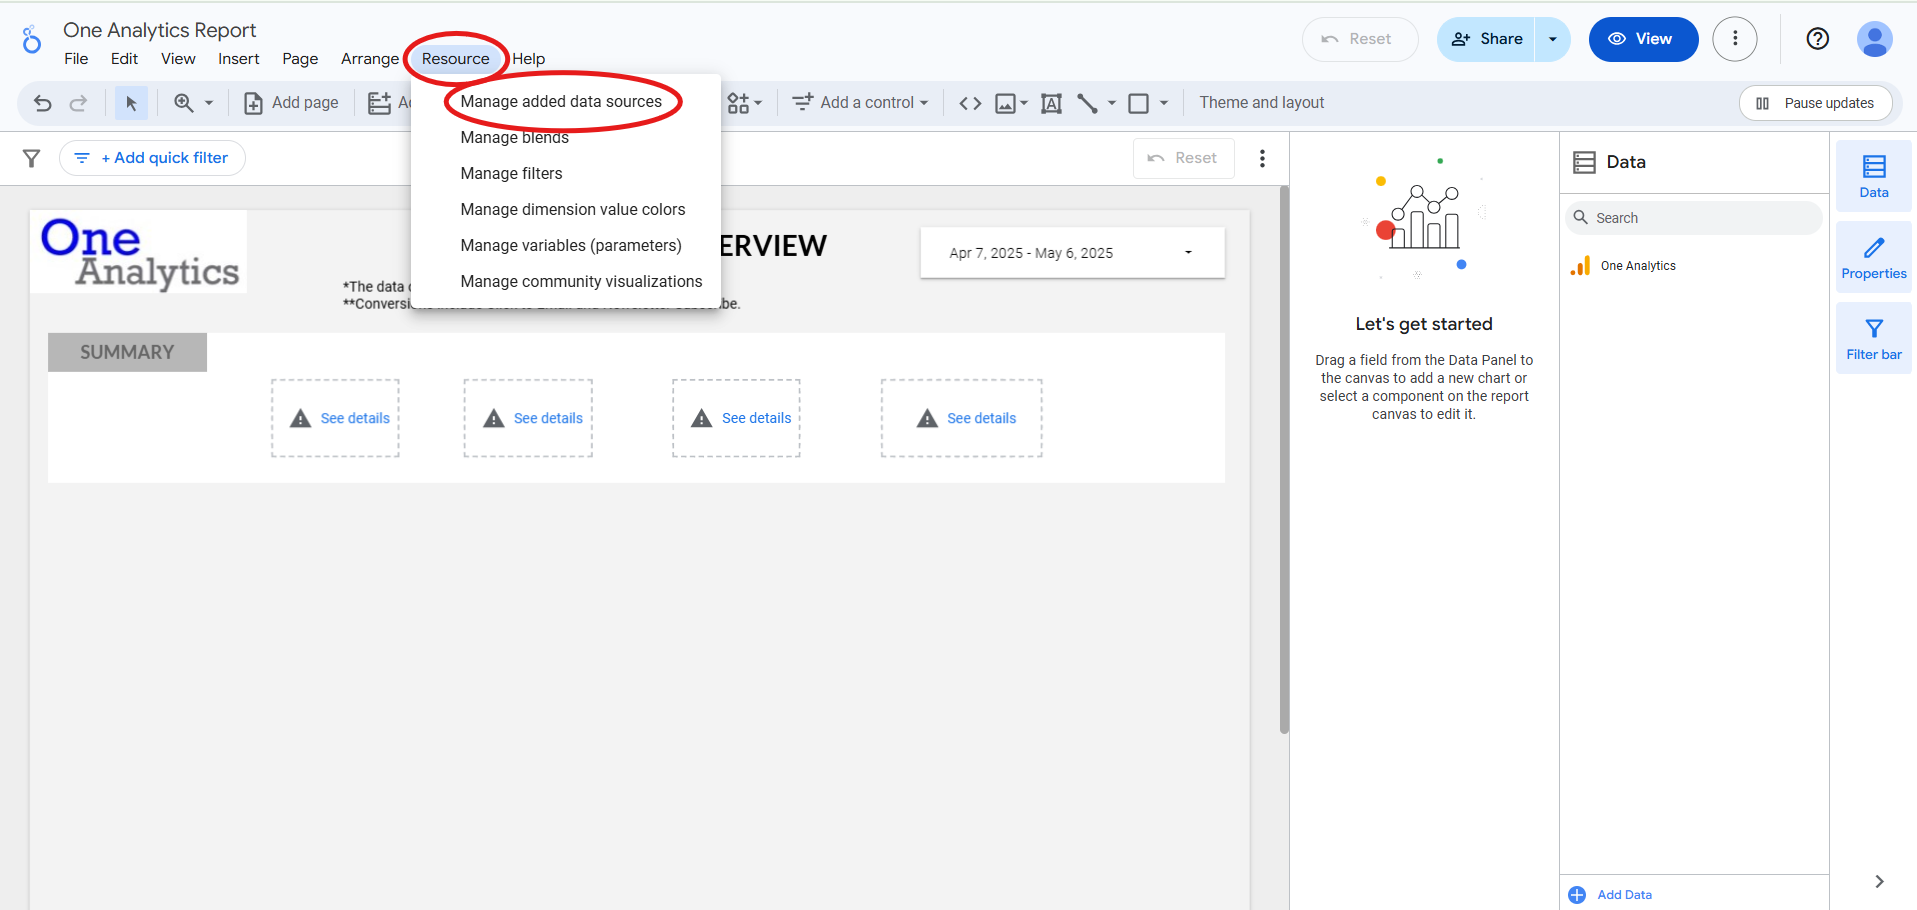
Once you see your source listed, you’re good to go! You can now start building charts, tables, and filters based on your newly connected data.
Conclusion
Now that you know how to add a data source in Looker Studio, you’re ready to start building dynamic, data-driven dashboards. Whether you’re working with data from Google Analytics or other platforms, connecting your data is the first step toward uncovering insights that matter.
Need a hand getting your Looker Studio reports set up the right way? Explore our Looker Studio consulting services to get from setup to insights quickly and easily.

